
Connect the Smartglasses to WiFi
To use our smart glasses for SignGlasses sessions, the glasses will need to connect to the WiFi in the location you are using them. This guide will walk you through connecting them.
Pro Tip: Download the Vuzix View app
For ease of setup, we recommend downloading the Vuzix View app to your computer. This app lets you control the glasses from your computer.
Simply plug the glasses into your computer and open the Vuzix View app on your computer. Once you turn on the glasses, you'll be able to select them from your computer and control them through the app.
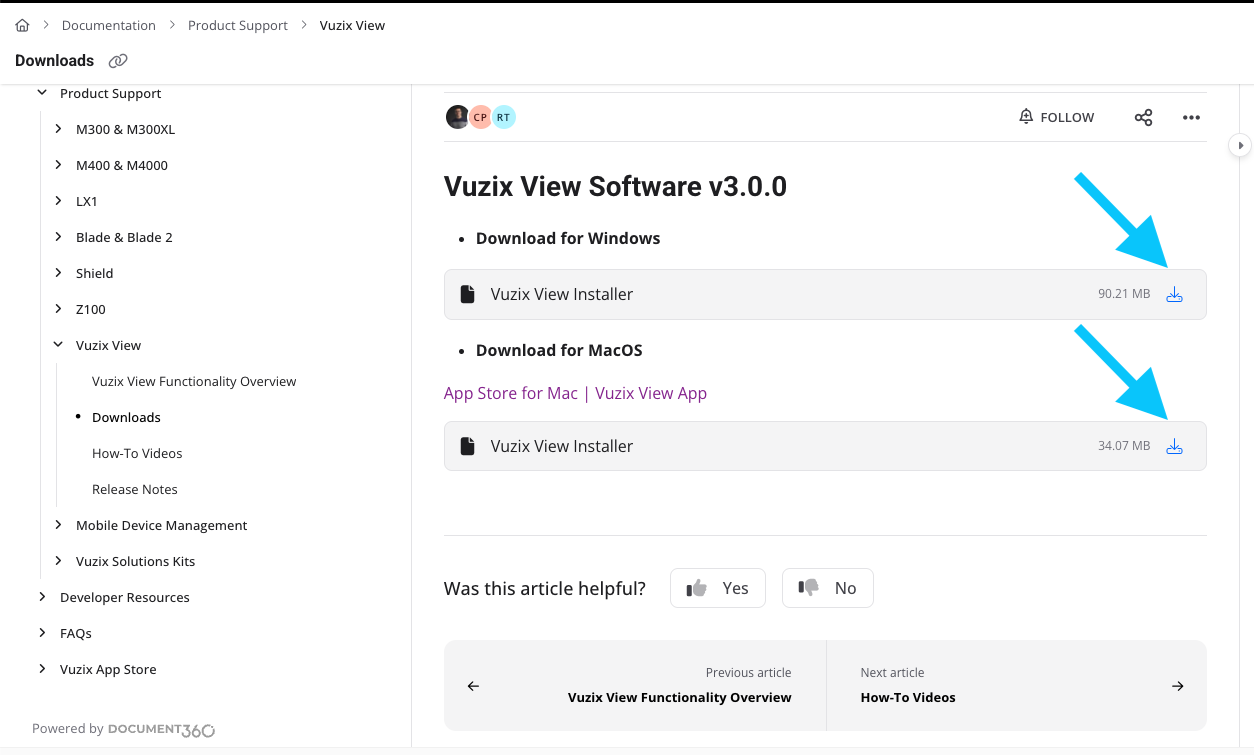
This app isn't required, but it will make typing the WiFi password much easier!
Turn on the glasses
Locate the power button on the inner left side of the glasses.
Press and hold the button for 3 seconds.
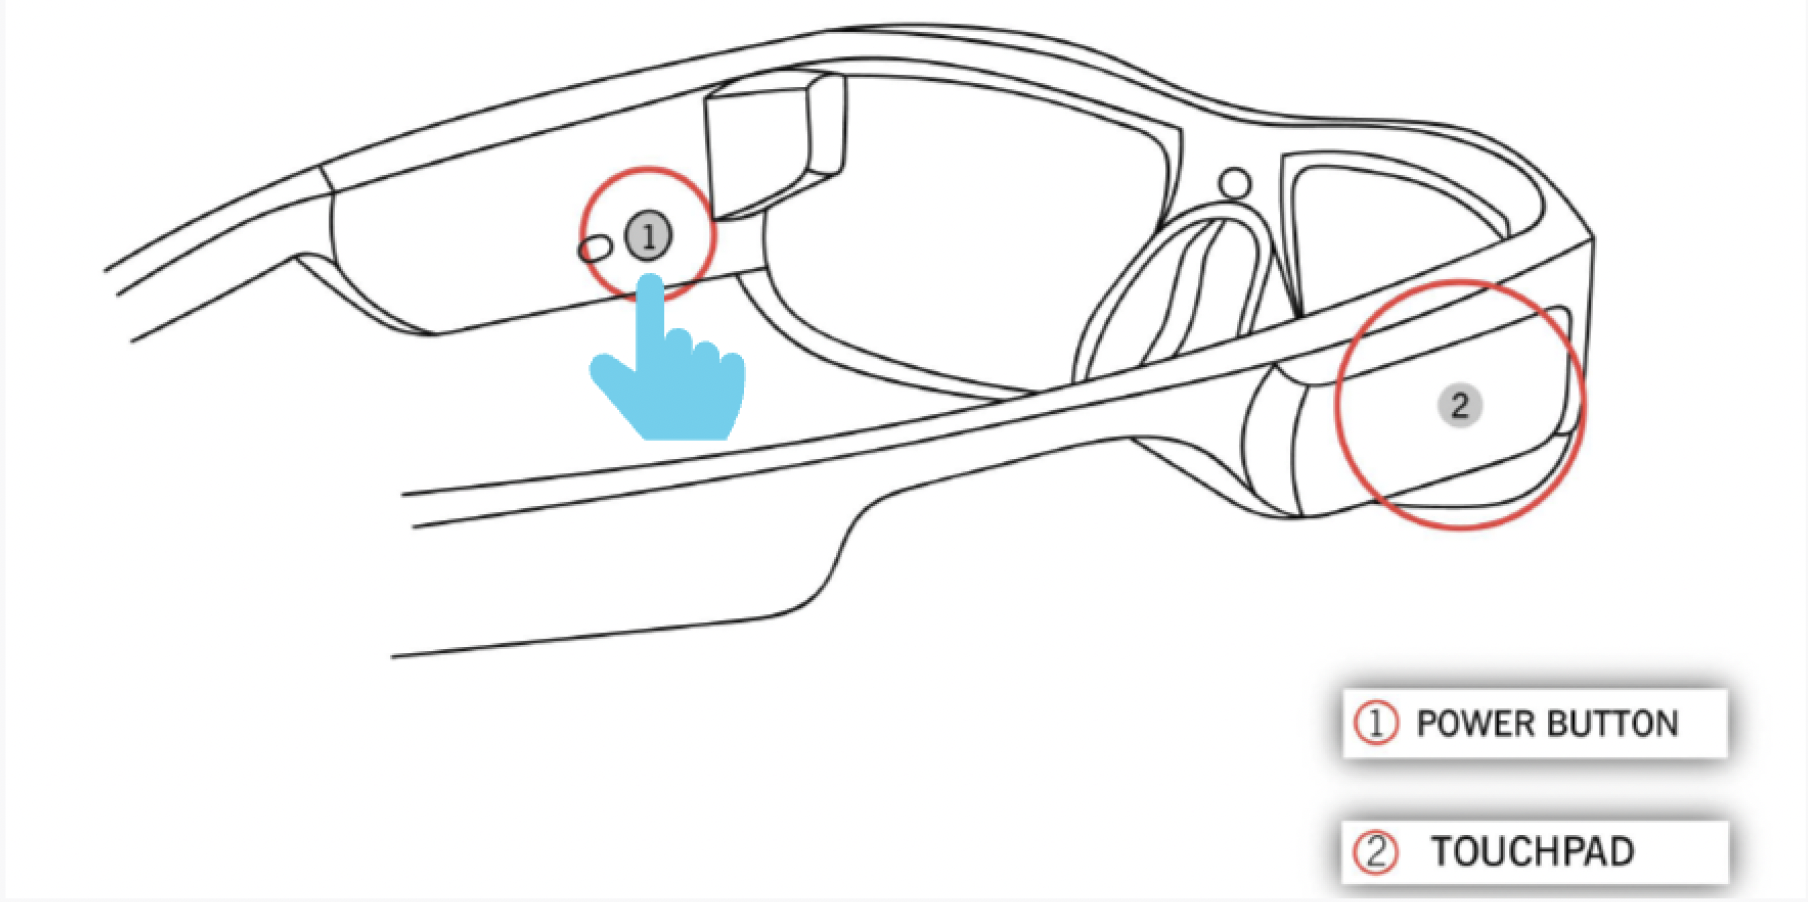
Wait for the green light to appear next to the button.
Put on the glasses to see the Vuzix loading screen.
If you don’t see this light or the Vuzix screen, please plug in the glasses to charge. Wait a few moments and try powering them on again.
Connect to WiFi in the glasses
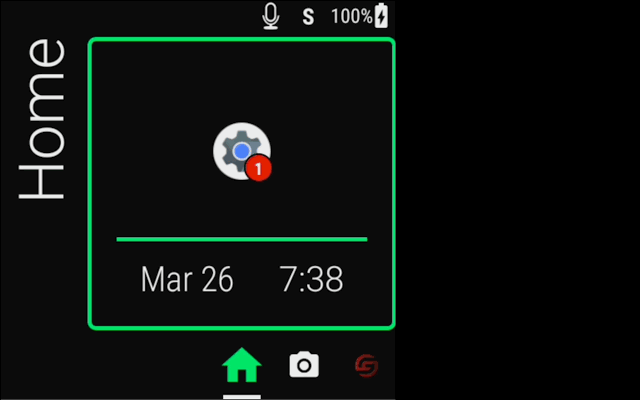
Once the glasses are powered on,
Swipe forward to move to the right until you get to the gear icon
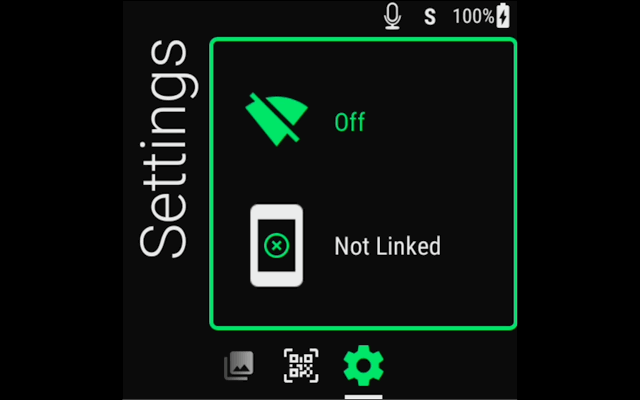
You will see the Settings page preview in the glasses
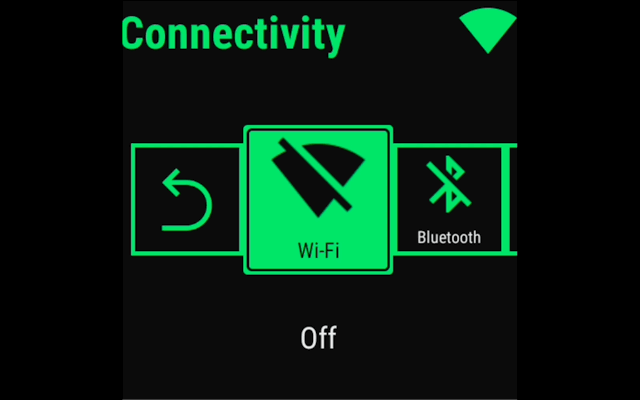
If they are not connected to WiFi, it will say "Off"
If the glasses are already connected to the Wifi, you will see the network’s name
If it says "Off":
Tap to select the gear icon to open the settings
Locate the [Connectivity] option and tap the touchpad to select it
Now you will see the Wifi icon crossed out with “Off” at the bottom.
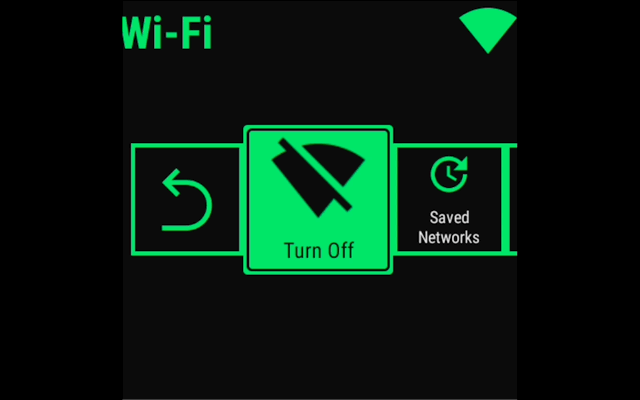
Tap the touchpad to select the [WiFi] icon
Tap again on the icon that says [Turn On]
Swipe over to and tap the the [➕Add Network] icon
Find the the network you wish to connect to and tap it
Use the text keyboard that appears to enter in your WiFi password.
Gently swipe your finger to move to different letters and tapping once to select a letter.
Click the check ✅ button when you are done
Select [No] to configuring advanced options
The glasses will automatically connect to the WiFi when you’re in this location from now on! If you have already connected to your desired network on these glasses, simply select [Saved Networks] to select it and connect from there.
To confirm you are connected, you can check your settings page in the glasses. If it shows your WiFi network, you are all set to use the glasses for SignGlasses.
To return to the Home screen, use two fingers to tap simultaneously and tap 2 -3 times.
Continue through our guide on Using the Smartglasses in SignGlasses to see how to connect to a session.
Whitelist the glasses in your Network if needed
If your network requires whitelisting of devices for internet access, you will need the MAC address of the glasses. To find the MAC address for the glasses,
Swipe forward on the touchpad until you see the gear icon again.
Tap the gear icon to open the Settings page.
Swipe forward to find [System], then tap to select it.
Scroll forward and tap [About].
Tap to select [Device Info]
Here you will see the MAC address for your glasses.
Any questions? Please reach out to us at techsupport@signglasses.com.