
Submit your Invoices
SignGlasses has an invoicing system built directly into the platform - No need to download anything!
You will use this for submitting all of your invoices to us.
Please note that you will need to wait 24 hours after a job is complete to submit an invoice for it.
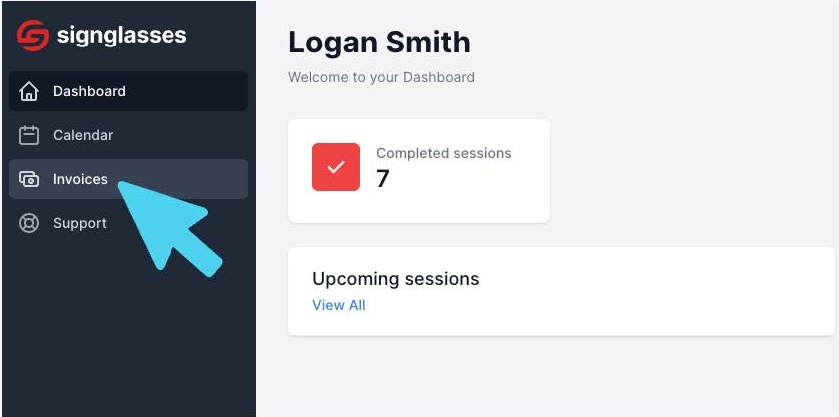
Open the Invoices page
Log into your SignGlasses account
Select the Invoices pages on the left-hand side of your screen.
Click the red button in the top right corner that says [+ New].
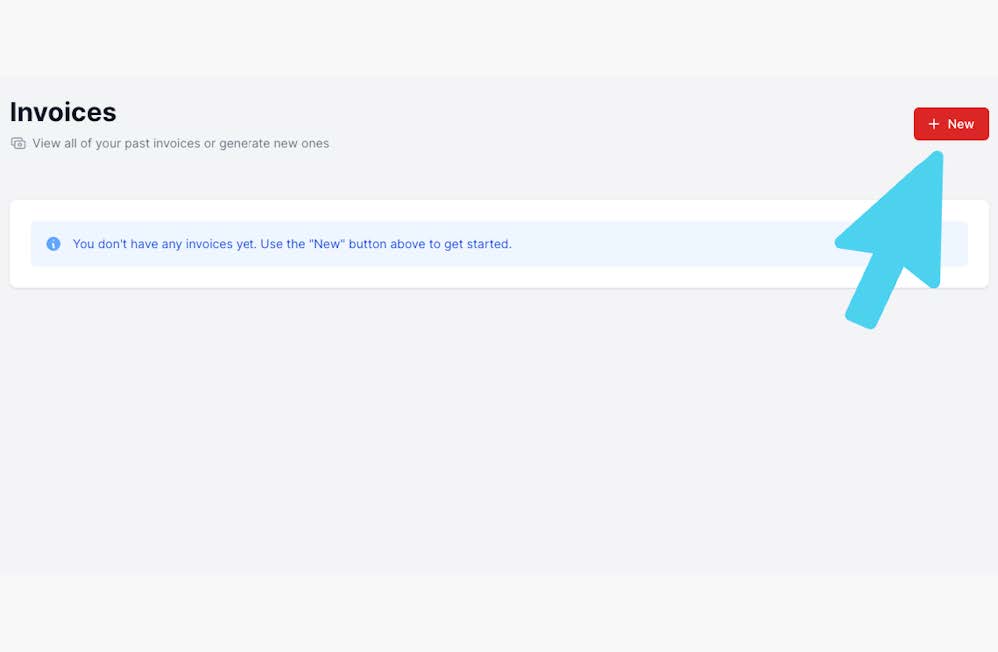
This page shows Invoices that you have already submitted and shows their status. If you haven't submitted an invoice yet, it will say that you don't have any invoices yet. This is normal! That message will change after you continue through these steps.
Submit the Invoice
Enter in the date range for the job(s)
Any and all SignGlasses jobs that took place within that time will show up and will automatically be selected.
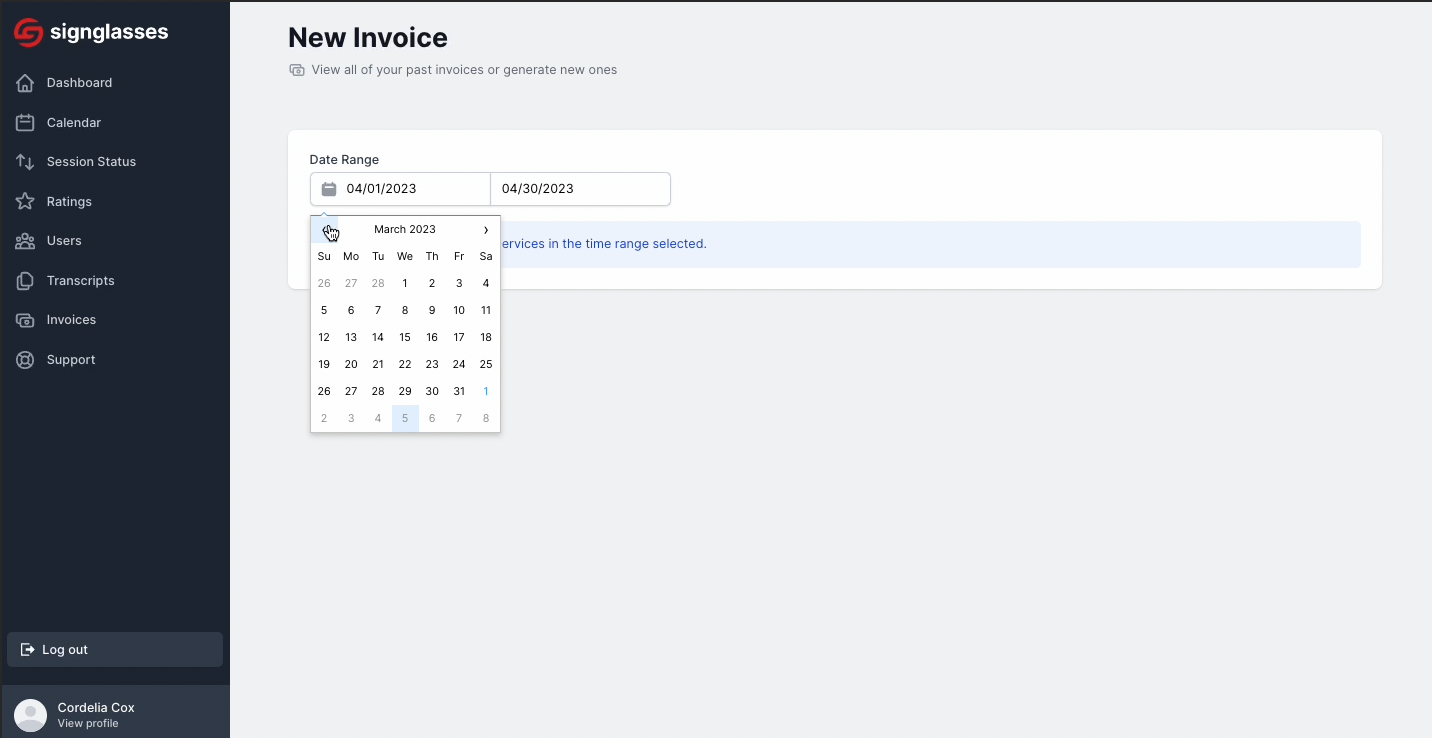
Click [Create Invoice] at the bottom-left of your screen.
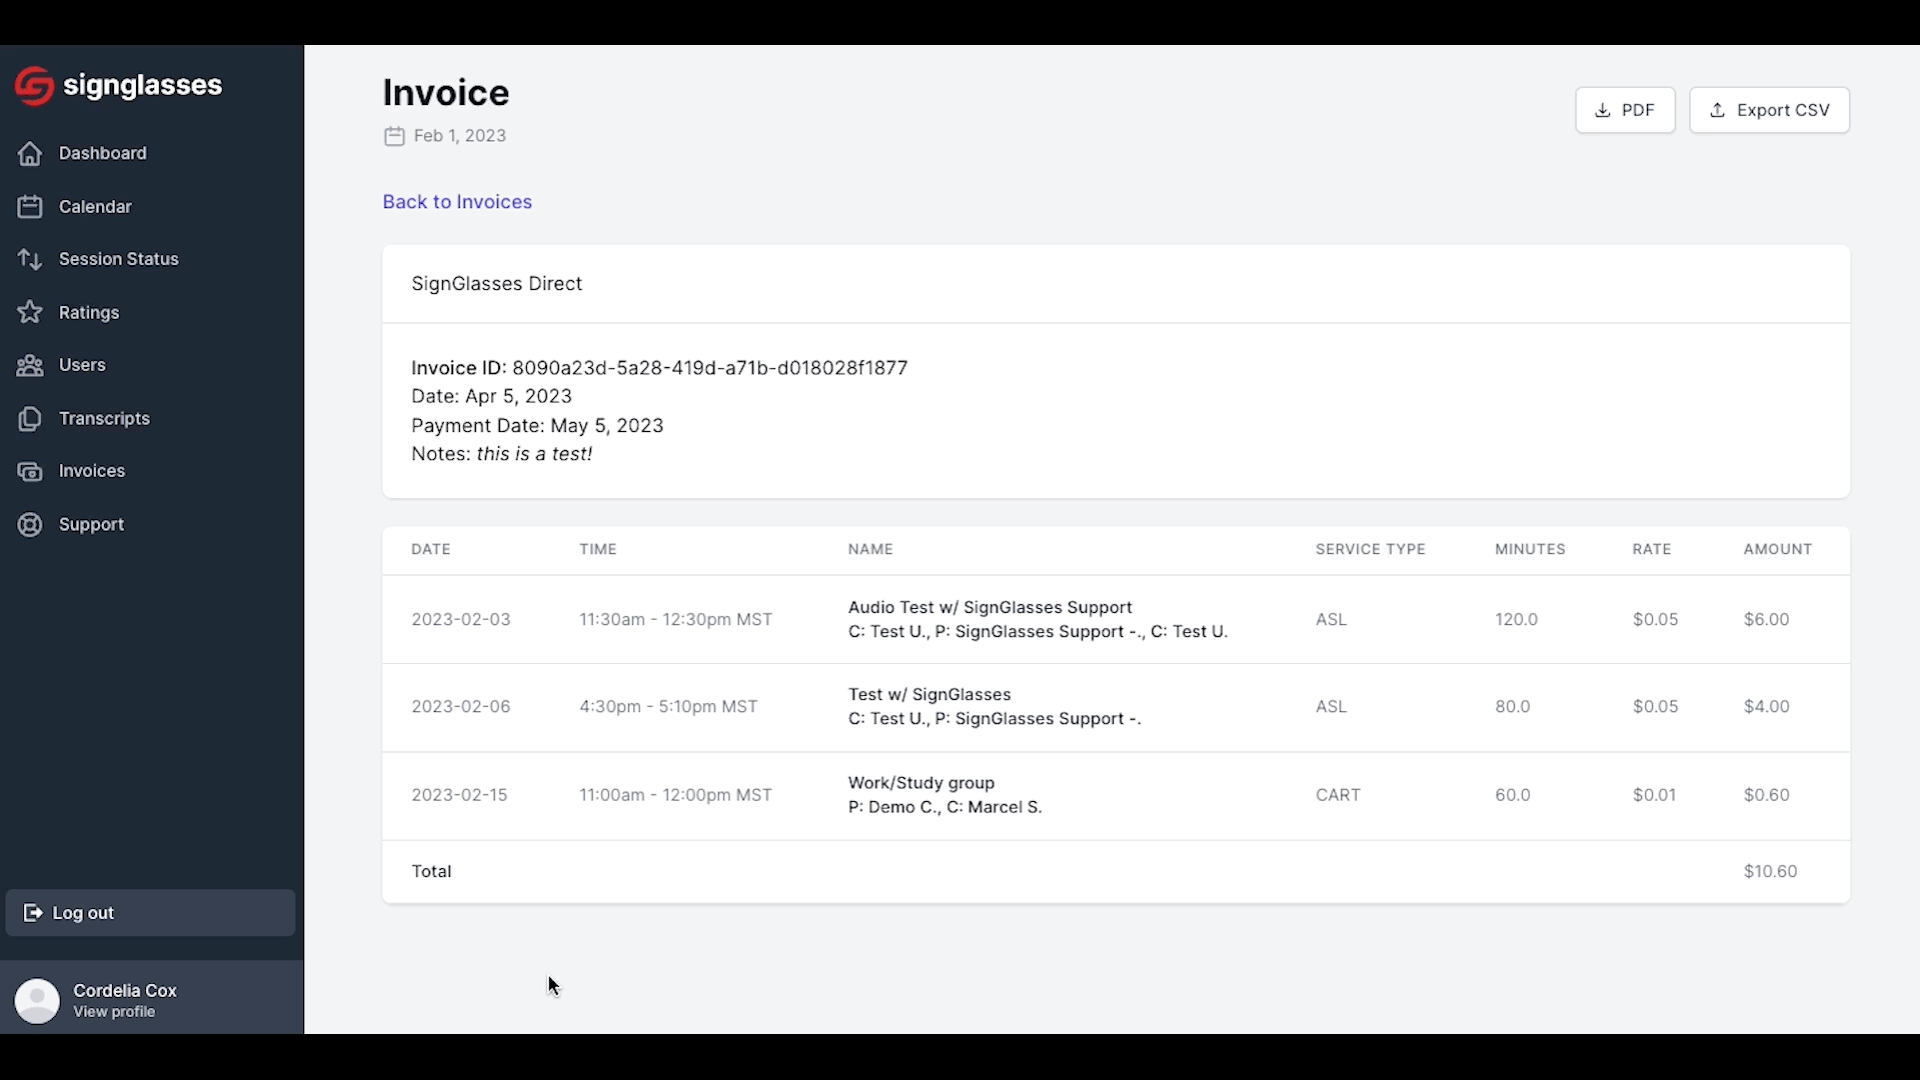
You will see the name, date and time duration of these sessions. This also will show the total monetary amount you are submitting an invoice for.
Your invoice has been submitted!
You can see the details for the invoice on this page. To see the status of the invoice, click the text at the top left of the screen that says Back to Invoices.
You will get an email from bill.com within 30 days of submitting your first invoice. (Please don't go to bill.com directly! Wait for the email). If you don't see the email within 30 days:
Check your spam folder
Reach out to us at ops@signglasses.com
If you need update your name, address, direct deposit info, etc. log in to your bill.com account and update it there after you receive this email.
Review your submitted invoices
You're all set! This page shows the current statuses of all your invoices.
The status of the submitted invoice should now be "Pending". The status will change to "Scheduled" and then lastly to "Paid", once you have been paid.

Please allow 30 days for the payment to go through after you have submitted an invoice. To see exactly when it is scheduled for, click on the blue text under "ID". This will open a new page and show you the date.